Scene composition
Here are training materials dedicated to the assembly of proteins and/or DNA in a 3D scene
-
How to move a structure in space?
-
How to create a nucleoproteic complex with circular DNA?
-
COMING SOON: How to model a cluster of single-strand DNA binding proteins?
How to move a structure in space?
This short tutorial shows how to translate and rotate a structure. This is useful when you want to position various structures in space (scene composition)
1/ Go to the Protein Data Bank and download the nucleosome corresponding to PDB code 1KX5.
2/ Make a copy of the file 1KX5.pdb and name it 1KX5_2.pdb [GraphiteLifeExplorer can not open two instances of a same structure].
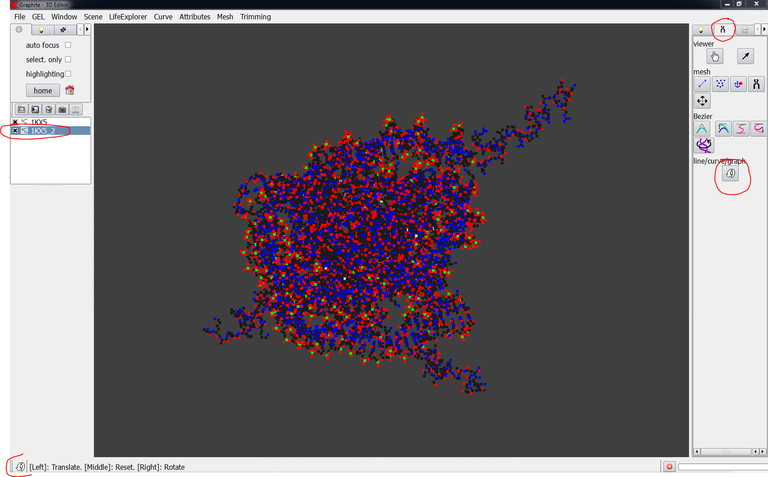
3/ Launch GraphiteLifeExplorer and load PDB 1KX5. Then load 1KX5_2.pdb. the image below shows what you obtain: the two structures are present in the outliner, and perfectly superimposed in the 3D view as a cloud point representation :

We now want to move the structure corresponding to 1KX5_2.pdb:
4/ Select 1KX5_2 in the outliner, go to the Tool tab and click on the curved arrow. You are now in the translation/rotation mode as indicated by the curved arrow-like icon in the left lower corner of the screen:
5/ Move the structure by pressing the left mouse button (LMB) and dragging the mouse:

The structure goes back to its initial position if you click on the middle mouse button (MMB).
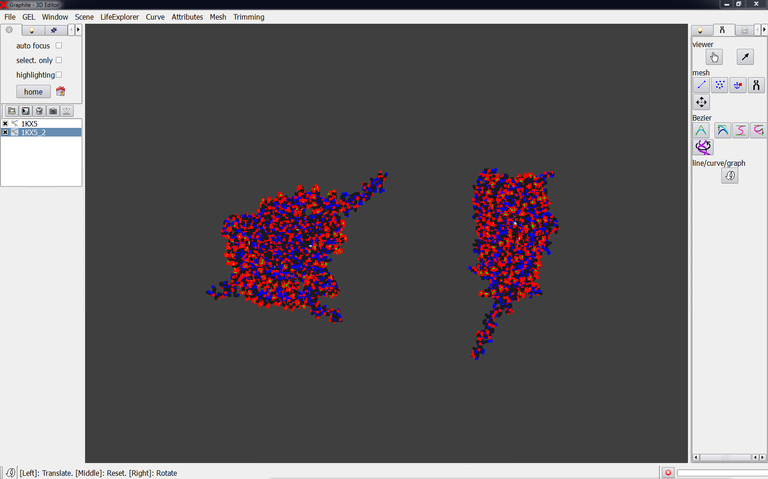
6/ You can rotate the structure by using the right mouse button (RMB):
Note that you can export the structure corresponding to 1KX5_2 in the PDB file format (with the function Write PDB available from the GraphiteLifeExplorer window): the new PDB file contains the new coordinates.
How to create a nucleoproteic complex with circular DNA?
This folder contains a written tutorial as well as pdb and 3D files
-
Tutorial_files
-
Written tutorial
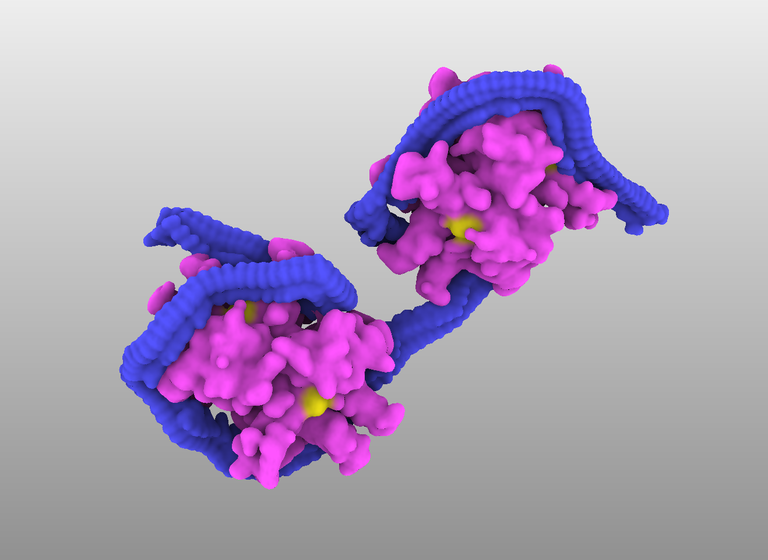
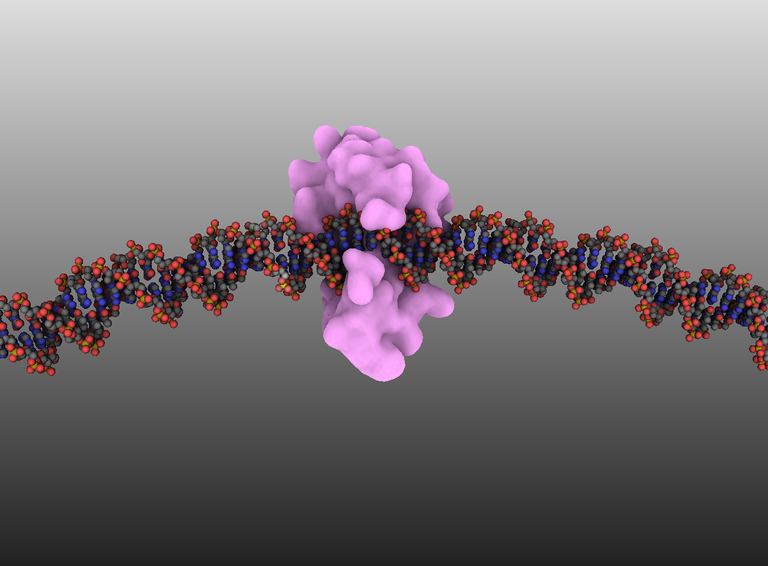
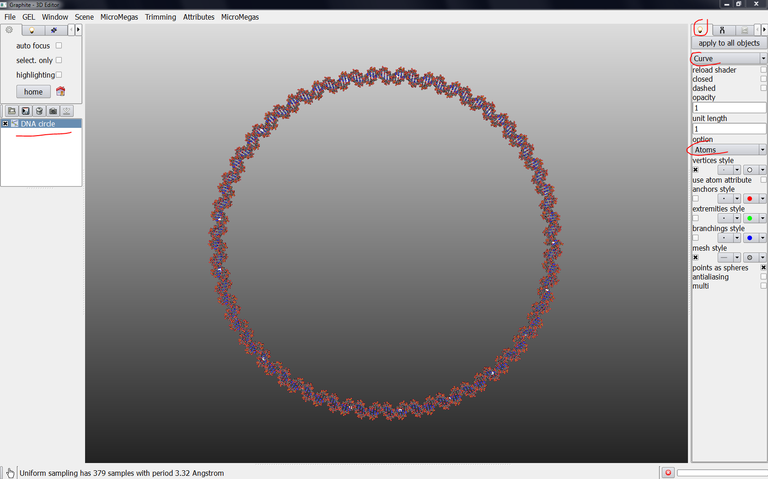
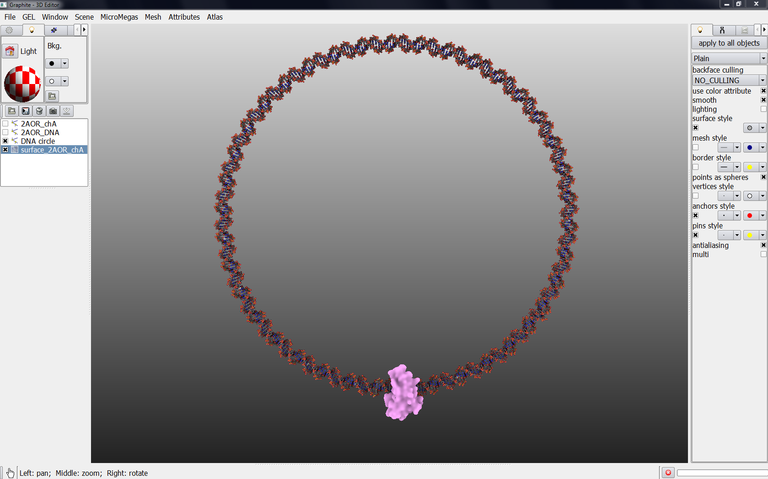
This tutorial shows how to create such a complex shown in the image below. The DNA circle is 40 nm diameter onto which is attached the bacterial mismatch repair protein MutH.
This tutorial shows how to create such a complex shown in the image below. The DNA circle is 40 nm diameter onto which is attached the bacterial mismatch repair protein MutH. (by D. Larivière, Fourmentin-Guilbert Foundation, S. Hornus, INRIA-LORIA)
Note: Graphite-MicroMégas has a new name: Graphite-LifeExplorer. In the screen captures hereafter, read Graphite-LifeExplorer or LifeExplorer instead of MicroMégas
This tutorial is interesting to know:
- How to import a file with x,y,z coordinates and convert it into a DNA representation
- How to create a protein surface
- How to adjust DNA to a protein

1/ Download Tuturial_files.zip and copy the content in your disk
2/ Tuturial_files.zip contains DNAcircle.dat, 2AOR_chA.pdb and 2AOR_DNA.pdb, and DNAcircle.pdb. Copy the files in a folder of your choice.
Note: The PDB file 2AOR is made of 2 protein chains A,B and 2 DNA chains C,D. We made a copy of 2AOR.pdb, renamed the new file 2AOR_chA.pdb and edited the file to remove chain B, C and D. We made another copy of 2AOR.pdb, renamed the new file 2AOR_DNA.pdb and edited the file to remove chain A and B.
3/Launch Graphite-LifeExplorer
4/ Note: Opened in a text editor like Bloc-notes or Wordpad, DNAcircle.dat is made of 3 columns. Each line represents the coordinates x,y,z of a point in space. The succession of the points forms here a 40nm diameter circle.
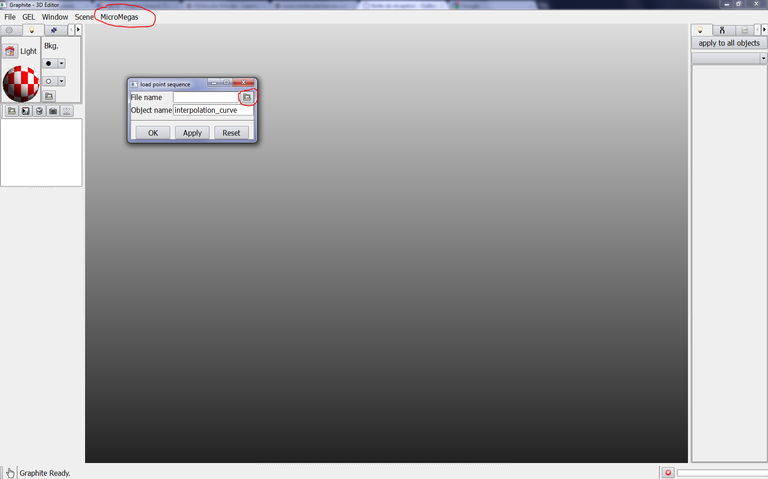
From the main window, go to the LifeExplorer menu and select load point sequence, click on the icon on the right:
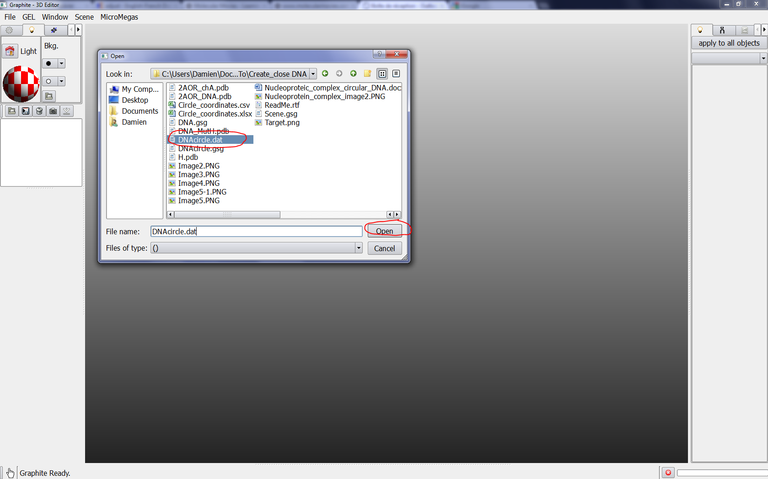
Select DNAcircle.dat in the popup window and click on Open…
… and select Nanometer in Coordinates unit (since this is the unit of the DAT file; note that it does not change the reference unit of the tool which is Angstrom, rather it applies the right conversion when reading the file), then click on OK in the popup window “load point sequence:

Nothing happens, the scene remains empty.
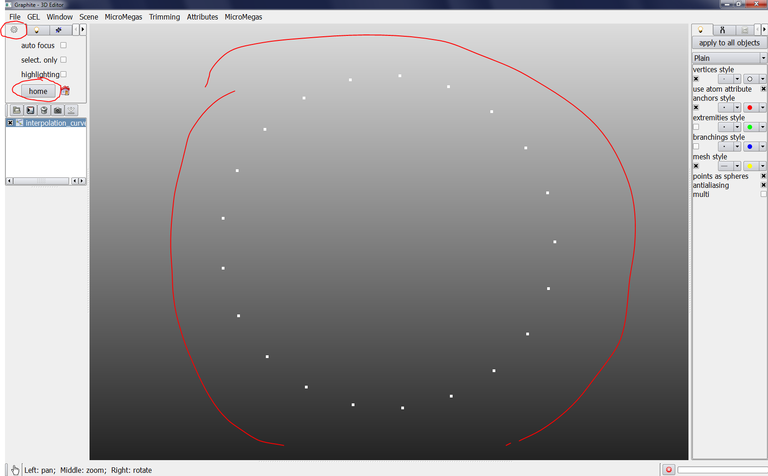
Go to the tab with an icon representing a wheel gear and click on home, a succession of points forming a circle is displayed:
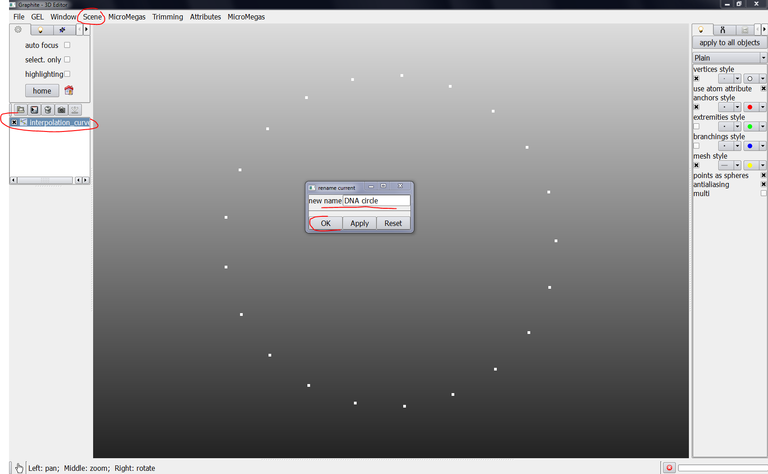
5/ Select “interpolation curve” in the outliner, go to the scene menu, select “rename current” and enter DNA circle as new name and click on OK:

6/ Check that DNA circle is selected in the outliner (highlighted in blue), go to the light tab, select “Curve“ instead of “Plain”, select “Atoms” in option instead of “None”:
7/ From the Graphite-LifeExplorer window, click on Load PDB and select 2AOR_chA.pdb, click on Open:
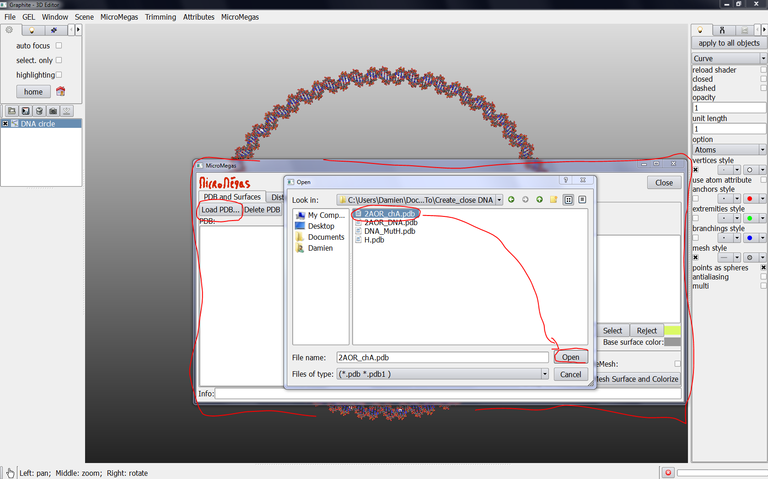

8/ From the Graphite-LifeExplorer window, click on Load PDB and select 2AOR_DNA.pdb, click on Open:

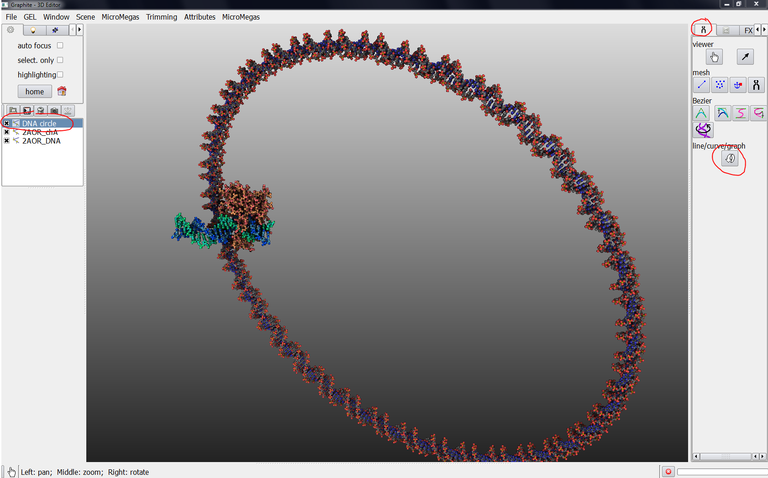
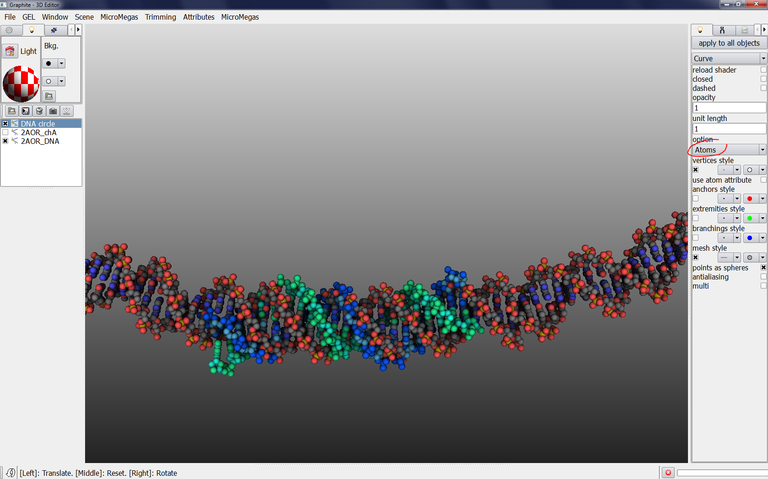
9/ From the main window, select 2AOR_chA in the outliner, go to the light tab, select molecule, and size 1. Select 2AOR_DNA in the outliner, go to the light tab, select molecule, and size 1:

8/ It is time to move in the scene. The first solution is to go to the Tool tab and to click on the icon showing a hand, and then try the mouse left button (MLB) and the MRB and see what happens. Use the Mouse wheel and see what happens.
Another solution to move in the scene is to keep the Ctrl key pressed while using the mouse buttons .
So move in the scene to reach this position (Zoom in/ out with mouse wheel, pan movement with MLB, rotation with MRB):

9/ Click on the black arrow close the Tool tab up to see the FX tab:

10/ Click on the FX tab and select Ambient occlusion instead of None. This adds more realism in the way light radiates in the scene. Camera movements may be more accurate now:

11/ Zoom out the scene (mouse wheel) and make a pan movement (MLB):

12/ Select DNA circle in the outliner, go to the tool tab and click on the curved white arrow:
13/ The curve white arrow enables to move the object selected in the outliner: The MRB enables to translate the object, the MLB enables to rotate the object.
Reminder: There are several using modes in Graphite-LifeExplorer: The camera mode enabling to move in the scene, the object mode enabling to move an object, several modeling modes enabling to create a DNA model, a linker, to change the twist of a DNA model,… When you press the Ctrl key, you are in the camera mode. The screen bottom always recalls which mode you are in.
Try to get this position for the DNAcircle:

14/ Move the DNA circle so that it is superimposed onto 2AOR_DNA:


Reminder: As soon as you move an object, go to File, Save current, give a name like name.gsg and save.
15/ Uncheck 2AOR_chA in the outliner to better visualize the superimposition of the two DNA objects:

16/ Check DNA circle in the outliner. At the bottom of the screen, on the left side, it is recalled that the mode “translate/rotate selected object” (the curve white arrow) is still active, so that you can move DNA circle:

17/ Adjust the superposition of DNA circle on 2AOR_DNA. Do not forget: When you keep the Ctrl key pressed you can move in the scene; and when you release the Ctrl key you move DNA circle. That’s very convenient for carrying out such an adjustement which requires to swing very often between the camera mode and the object movement mode.
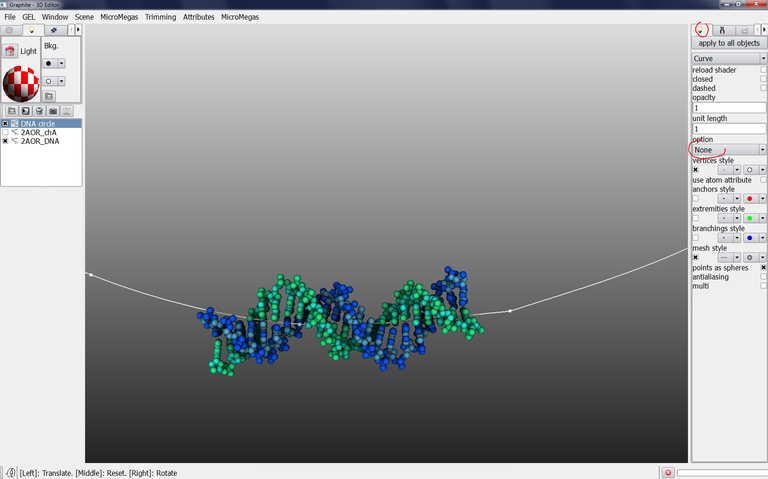
You can stay in the “atoms” rendering or you can select None in Option in the light tab in order to get a line rendering. You might consider that this rendering helps the superimposition:
18/ Select Atoms in Option:
19/ Click on the “Adjust DNA’s base pair position” and click on DNA circle in the scene, a yellow circle appears:

20/ In the image above, the message Base pair 13 is outlined. Click on the “Adjust DNA’s base pair position” tool (although this mode is activated) to display the message recalling how to use it:
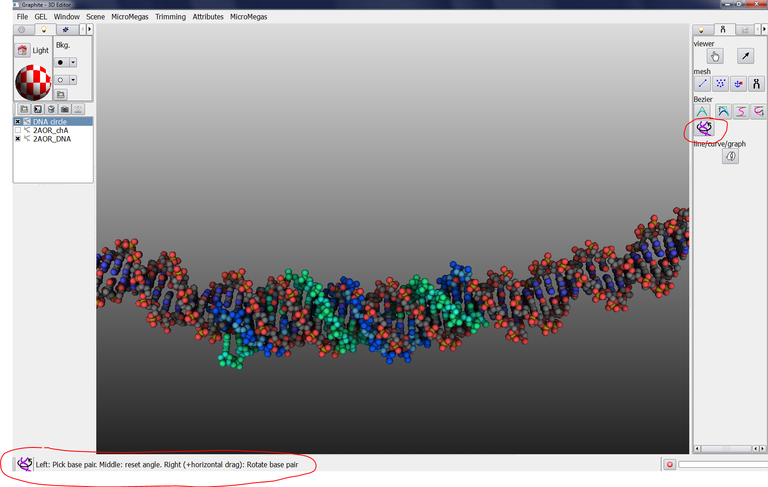
21/ The yellow circle has disappeared, click again on DNA circle in the scene to select a base pair, and drag the mouse horizontally up to get a better superimposition:

22/ Keep Ctrl key pressed (or click on the Hand icon) and move around the objects to verify the superimposition from several angles of view:

This is quite correct. However you can decide to improve the superimposition by translating and/or rotating DNA circle again. Note that base pair 11 is selected (it is displayed with a lighter grey to find it back easily). If you decide to adjust again the rotation of the DNA around its axis with the “Adjust DNA’s base pair position” tool, you must select base pair 11 (you just have to click on DNA circle, the selected base pair is indicated in the reminder zone at the bottom of the screen; if you click and base pair 11 is not selected but base pair 10, just click on the base before or after; a base pair is really selected when you start to drag horizontally ). So If you don’t select base pair 11 but 13 for instance, and you drag, the local orientation will not affect the whole DNA circle but a part.
Reminder: As soon as you move an object, go to File, Save current, give a name like name.gsg and save. You can also export the circular DNA into the PDB format (go to the LE Curve menu for that).
23/ Uncheck 2AOR_DNA in the outliner but check 2AOR_chA:

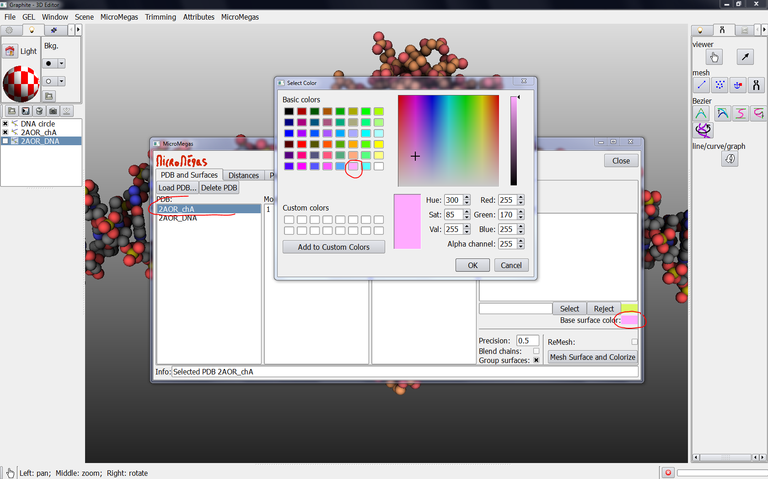
24/ From the Graphite-LifeExplorer window, select 2AOR_chA as shown in the image below, click on the color in front of Base surface color and choose a color in the Select color popup window and press OK:
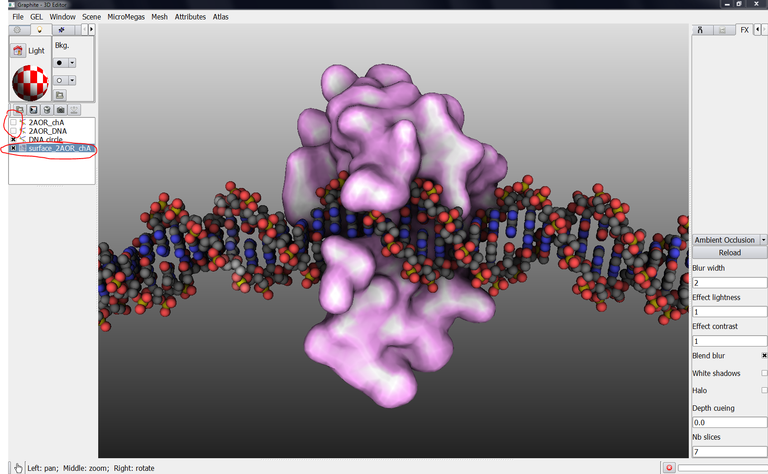
25/ Press Mesh Surface and Colorize (with Group surfaces unchecked, Blend chains uncheked, Precision 0.5), and wait up to see a surface surrounding 2AOR_chA. A new object named “mm.2AOR_chA.1.A appears in the outliner:

26/ Select mm.2AOR_chA.1.A in the outliner, from the Scene menu, select Rename current and rename surface_2AOR_chA. Uncheck 2AOR_chA and 2AOR_DNA in the outliner:
27/ You can get another rendering for the surface: Check whether surface_2AOR_chA is selected in the outliner, go to the light tab and uncheck “lighting”:

28/ Zoom out, move the camera to get this camera angle:
Adding a second protein
29/ Select 2AOR_DNA in the outliner, go to the File menu and Save current, give the name 2AOR_DNA.gsg (We will explain later why we have to save 2AOR_DNA in the GSG format) :
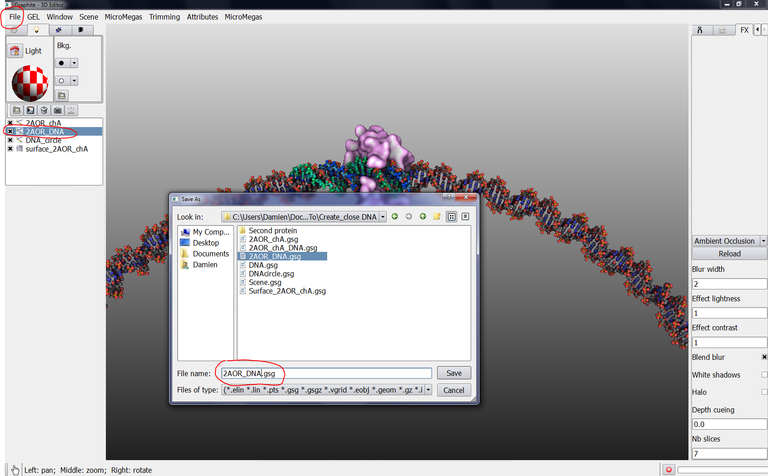
30/ Select surface_2AOR_chA in the outliner, go to the File menu and Save current, give the name surface_2AOR_chA.gsg (We will explain later why we have to save it in the GSG format):

31/ Select 2AOR_DNA in the outliner, go to the Tool tab, click on the curved white arrow:

32/ Move 2AOR_DNA like in the image below:

33/ Superimpose 2AOR_DNA onto the DNA like in the image below. Turn DNA circle into a line to better superimpose the axis of 2AR_DNA and the DNA circle line:

34/ Once superimposition is correctly achieved, turn DNA circle into Atoms again:

35/ Select 2AOR_DNA in the outliner, go to the File menu and Save current, give the name 2AOR_DNA_2.gsg (don’t forget _2 before the extension gsg):

36/ Go to your file explorer, select surface_2AOR_chA.gsg, copy this file and rename it surface_2AOR_chA_2.gsg:

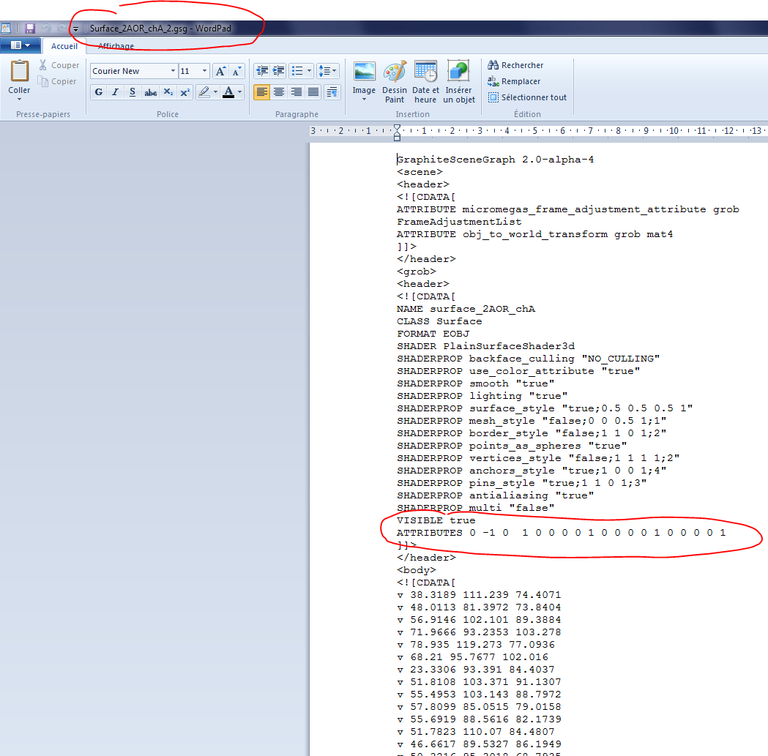
37/ From your file explorer, open 2AOR_DNA.gsg and 2AOR_DNA_2.gsg in a text editor. In 2AOR_DNA_2.gsg, select the numbers behind ATTRIBUTES and copy them:

We have to explain the process:
One can move (translate/rotate) in the scene an object corresponding to a PDB structure (with the curved white arrow). However, to date, if one creates a surface of this pdb structure previously moved, then the surface is created around the initial position of the atoms forming the structure. In fact, when moving a pdb structure in the scene, Graphite-LifeExplorer does not record the new coordinates of the structures into an actualized pdb file. The surface tool is disconnected of the translate/rotate tool (Note: fixed in the release of February, 16, 2012).
We cope with this by recording (in a house text 3D format called gsg) the global position of 2AOR_DNA when it was positioned at the first protein site (2AOR_DNA.gsg). We recorded the global position of 2AOR_DNA when it was positionned at the second protein site (2AOR_DNA_2.gsg). The set of numbers we copied at step 37 is the transformation matrix of the object. If we applied this matrix to the surface of the protein (surface_2AOR_chA.gsg), then this surface will be correctly positioned at the site of the second protein.
This method based on transformation is of general use as it can be used when a perfect superimposition is required between copies of the same PDB structure.
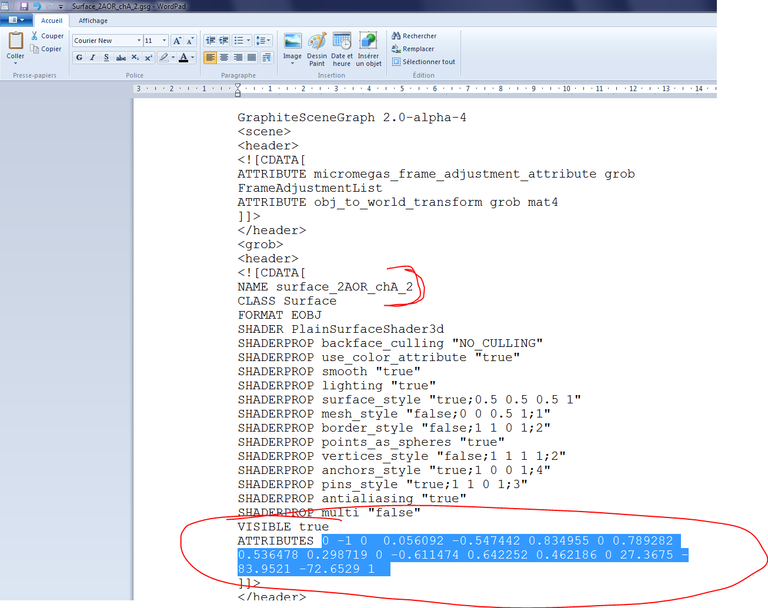
38/ From the file explorer, open surface_2AOR_chA_2.gsg and seek the transformation matrix out:
39/ Paste the numbers obtained at step 37, add “_2” after NAME surface_2AOR_chA and save the file:
40/ From the main window of Graphite-LifeExplorer, go to the File menu, Load, select surface_2AOR_chA_2.gsg, the protein surface is displayed, correctly positioned regarding the DNA portion contained in the file 2AOR.pdb:

41/ In the outliner, uncheck 2AOR_DNA:


COMING SOON: How to model a cluster of single-strand DNA binding proteins?
(SSB)35 binding mode (data from Raghunathan et al, Nature Structural Biology, Volume 7 Number 8, August 2000):